As promised, I am posting again before next month's post... it's slightly later than I would have liked, mainly due to my having been poorly.

This is because I have a bag pattern, which I was trying to upload to a Facebook group, but couldn't manage it (yeah, yeah, middle-aged technophobe). The thread started because in case you've missed it, as of 5th October 2015, England will catch up with the rest of the UK and begin to charge for single use carrier bags. This is a legal requirement, and shops failing to comply will face thousands of pounds in fines for every single bag they give away free.


Take the two large offcuts, and fold them right side together, then pin them. Ideally you should have a 1-2cm seam allowance.


I won't cover all the usual things, I'll save those for the next post (around a week away), this is going to be a how-to about making a reusable shopping bag.

This is because I have a bag pattern, which I was trying to upload to a Facebook group, but couldn't manage it (yeah, yeah, middle-aged technophobe). The thread started because in case you've missed it, as of 5th October 2015, England will catch up with the rest of the UK and begin to charge for single use carrier bags. This is a legal requirement, and shops failing to comply will face thousands of pounds in fines for every single bag they give away free.
Some large supermarkets (naming no names, but I'm sure an internet search will tell you) have promised to give the money they get from this to charity, but the charge is set to be 5 pence per bag.
In order to avoid paying this, more people will be taking their own reusable bags shopping with them, and I have a pattern for just such a bag.
In order to avoid paying this, more people will be taking their own reusable bags shopping with them, and I have a pattern for just such a bag.
Now the original pattern was for a lined bag, with an inner pocket, and I promise that I will upload a blog post for the full, lined and pocketed version in a few weeks.
However, for speed, here's the unlined, speedy and easy version.
DISCLAIMER: I am not a top-notch seamstress. I am, at best, average, at worst, barely passable. If I can do this, anyone can!
Second disclaimer: If you don't have a sewing machine, you can absolutely, stitch this by hand. LittleBit has made a miniature version by hand, as have I, however, it obviously takes longer to do, and it is very important that you use small, neat stitches. As small, as neat, and as close together as you possibly can.
I have a sewing machine, so I did use it.
You will need:

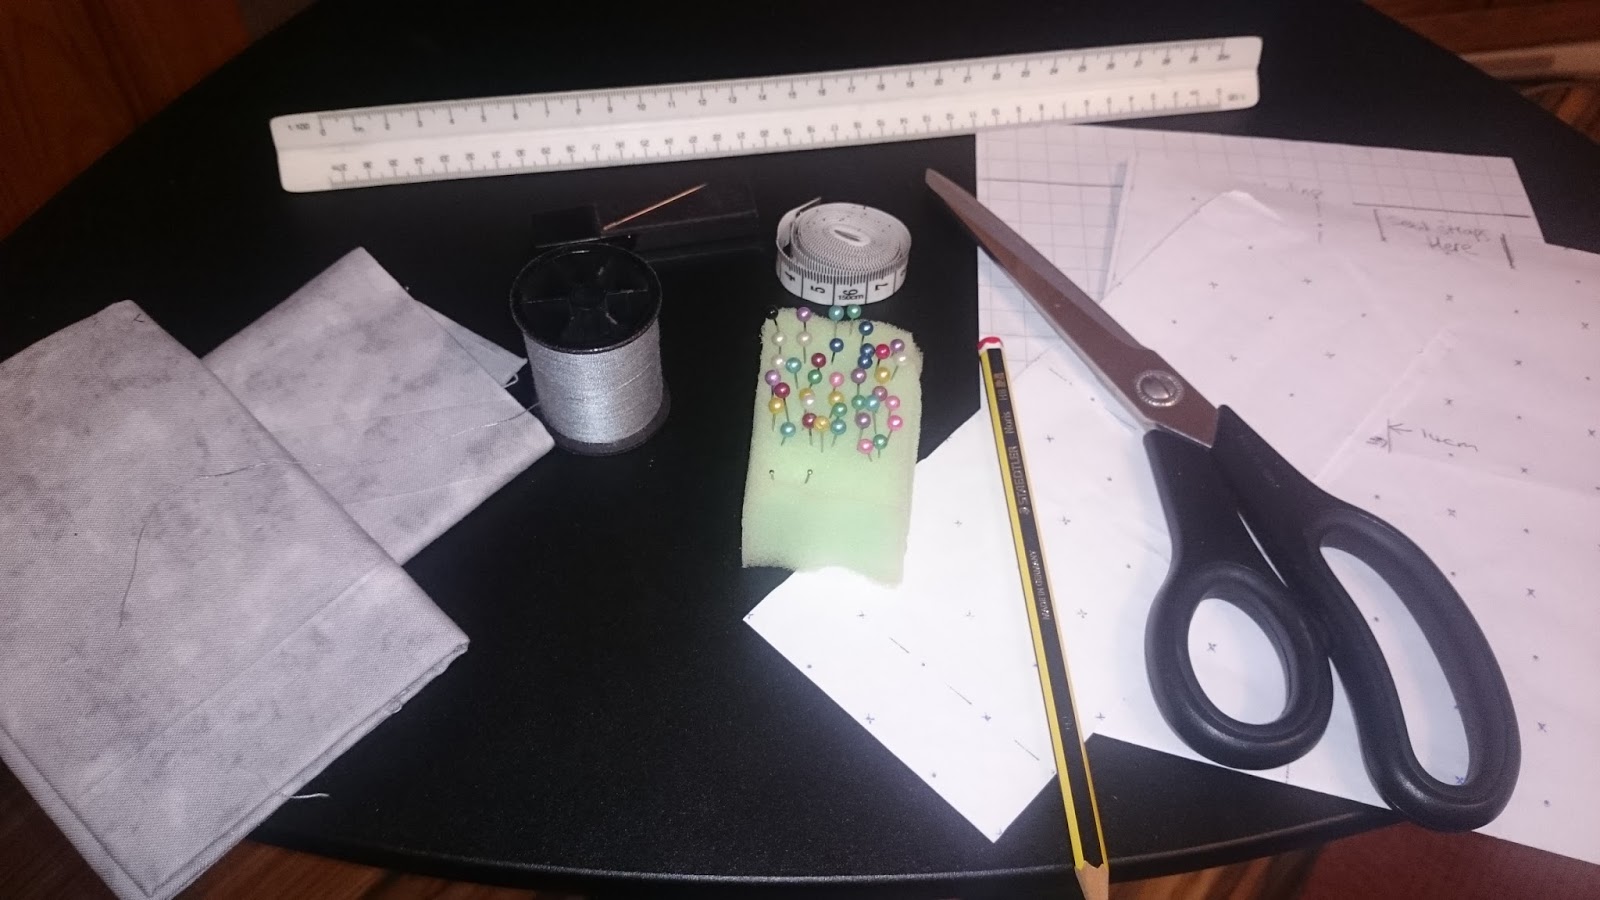
- Fabric. (If you're buying this, you can make this bag with 2 fat quarters, however, you can use cut up old clothes. Try to avoid using really thick fabric like good quality denim, unless you have a substantial needle/sewing machine needle, ideally a leather work needle, because the hems can snap an ordinary needle.)
- Cotton/thread.
- A tape measure (You can just use a ruler if you don't have one)
- A ruler (if you have a tape measure, but no long ruler, anything with a straight edge you can draw a line against will work - but you'll need something with measurements on.)
- A pencil (ideally a taylor's pencil, but a standard pencil will do for a shopping bag)
- Pins
- A needle (or sewing machine)
- Scissors (if you don't have dedicated fabric scissors, find the strongest, sharpest pair you have, and chop up some tin foil to sharpen them further before you use them.
- Access to an iron (and a surface to iron on)
Optional extras:
- A paper pattern (This is too big for a standard printer, so I've described it at the bottom of the post - you can make it yourself with a pencil, a ruler, a pair of scissors and a large piece of paper - kids art paper on a roll, or greaseproof paper will work fine. You don't need a paper pattern, you can just measure and cut the fabric directly, which I did making the bag for this example. But if you're not confident, it's worth using a pattern.)
- A knitting needle (this isn't for knitting anything, so don't go and buy one specially, you can use a pencil if you don't have one, the knitting needle just makes it a bit easier if you have one handy).
Using a sewing machine, it took me a total of an hour and a half, but I kept stopping and starting because I was doing other things, I could probably do it in 45 minutes or less, if I just sat and concentrated on it.
So anyway. Fabric. I used two fat quarters made out of the same fabric. In case you don't know what a fat quarter is, it's an end of fabric, sold pretty cheaply in fabric shops/online. I had two the same in my fabric basket, but you can do this with a cut up old t-shirt if you don't want to go and buy fabric especially.
Fat quarters usually come folded like this top picture, but unfolded, it's around 55cm square... Handily big enough to make one side and one handle of a reusable shopping bag. I am dull, and used two identical pieces of mottled grey fabric, but you can use two different patterned fabrics if you like.


Start by cutting the fabric to 44cm square. I did this by marking, with a pencil, along the fabric:

And then using a ruler to draw a straight line, which I then cut along:


Keep the offcuts. You will need the largest offcuts to make the handles with, and if you're using a sewing machine, the smaller offcuts to test the tension of the machine when changing stitches.
You need 2 identical squares and 2 identical offcuts.
On the large squares (front and back pieces) cut a 4 x 4cm square from the bottom two corners on both pieces (you can discard the resulting small squares):


Take the two large offcuts, and fold them right side together, then pin them. Ideally you should have a 1-2cm seam allowance.


Stitch this seam into place, and then comes the tricky part... turning the handles the right way out, It's actually fairly simple to do, but awkward to explain, so I've tried to video it.
Firstly, the originally video was too big to upload, so I had to split it into two - the start and the end... I started with a pencil, to prove it could be done, but it was a little too short, so I switched to a knitting needle part way through. It can be done entirely with a pencil, it just takes patience and perseverance.
I hate my voice, so I haven't spoken on the videos. Hopefully these explain how to turn the stitched up handles the right way out. Basically, turn the ends, use the blunt end of a pencil or knitting needle and gently push, whilst tugging the end gently with your fingers, until it's the right way out.
You should then iron the handles flat, with the seams in the middle/bottom:

If you are using a sewing machine, at this point, edge your front and back pieces with a zigzag stitch. You can overlock the edges if you're lucky enough to have an overlocker, but I don't, so this is my cheat... You don't have to do this step (especially if you're hand stitching it) but I was taught to always do it, and was using a sewing machine, so I did.


Then, iron the front and back pieces. Trust me, it makes it easier, even if you're hand stitching it.
Next, mark approximately 10cm in from the top edge of both the front and back pieces, from both side edges;

Pin the handles into place. They should be seam up, raw edges at the top, pinned to the right side (patterned side) of the front & back;

Then stitch the handles into place.

Next, turn the front & back pieces over (do it one at a time), and fold down the raw top edge, twice, to create a hem. Ideally, you should press this, and then pin it into place, with the handles up.


Stitch the hem into place, and then stitch a square from the base of the hem, over the handle (ideally more square than mine) in order to reinforce the handles.

Place the front and back pieces right-sides together;

Although you won't be stitching the top edge, I pinned the top edges together as it is important that these are level.


Then pin the two sides and the bottom edge;

Then, stitch the two sides, and the bottom edge - ignore the cut out bottom corners for a minute;


Finally, the cut out corners. Again, it may be easier to show you a video. Squeeze the corners together, pin, and stitch:


Turn the bag the right way out, and you're done! As you can see from the photos, it can take a fair bit of weight.


Anyway... if you do want a paper pattern, you will need:
- A square piece of paper 44 x 44cm
- A rectangle of paper 44 x 8cm
- A ruler
- A pencil
- Paper scissors.
As with the fabric, cut out a 4 x 4cm square in the bottom two corners, and mark 10cm in from the two upper edges (to note where the handles will go). Please excuse the Ikea paper tape measure... I do own an ordinary tape measure, but this lies flatter and I brought it home after measuring furniture in Ikea a while ago. At least I am reusing it so it doesn't go to waste.


(If you want to mark the pocket space for the lined version of the bag, draw a line approx 10cm from the top, approx 16cm long and approx 14cm from the edges. Try to keep it central, this is more important than the distances from the edge in cm. You'll also need a third pattern piece - approx 18.5cm(wide) x 20cm(tall) with a hemline drawn approx 3cm from the top)

For the unlined bag, cut two pieces of fabric to match each pattern piece, and follow the instructions as above.
That's all for now!
Comments
Post a Comment